The Sunday Blog: Advanced programming techniques

Nextion HMI as a serial monitor (2)
Part 1 of this series was already published in April, explaining the basics of the protocol reparse mode and using a Nextion HMI display as “simple” serial monitor. At the end, I promised a follow-up to show how a Nextion HMI could parse and decode the return data of another one – for sure a helpful debug tool. But then, we got the new Intelligent P series displays, followed by new editor releases with new features and then the new Discovery F series. All this led to intensive beta testing work and finally to me blogging about these more actual topics. But now, it’s time to keep my promise and to move on.
A Nextion HMI as a Nextion debugger
While I have already written about the Nextion return data in general here and there, for example the NextionX library (which waits to be finished, too) or a rather simple code snippet for Arduino to handle incoming data from a Nextion HMI, I will take a more systematic approach here and now, so that we will have a Nextion HMI with debugging capabilities more useful and informative as the code return pane in the simulator window at the end.
Data identification, integrity check and classification
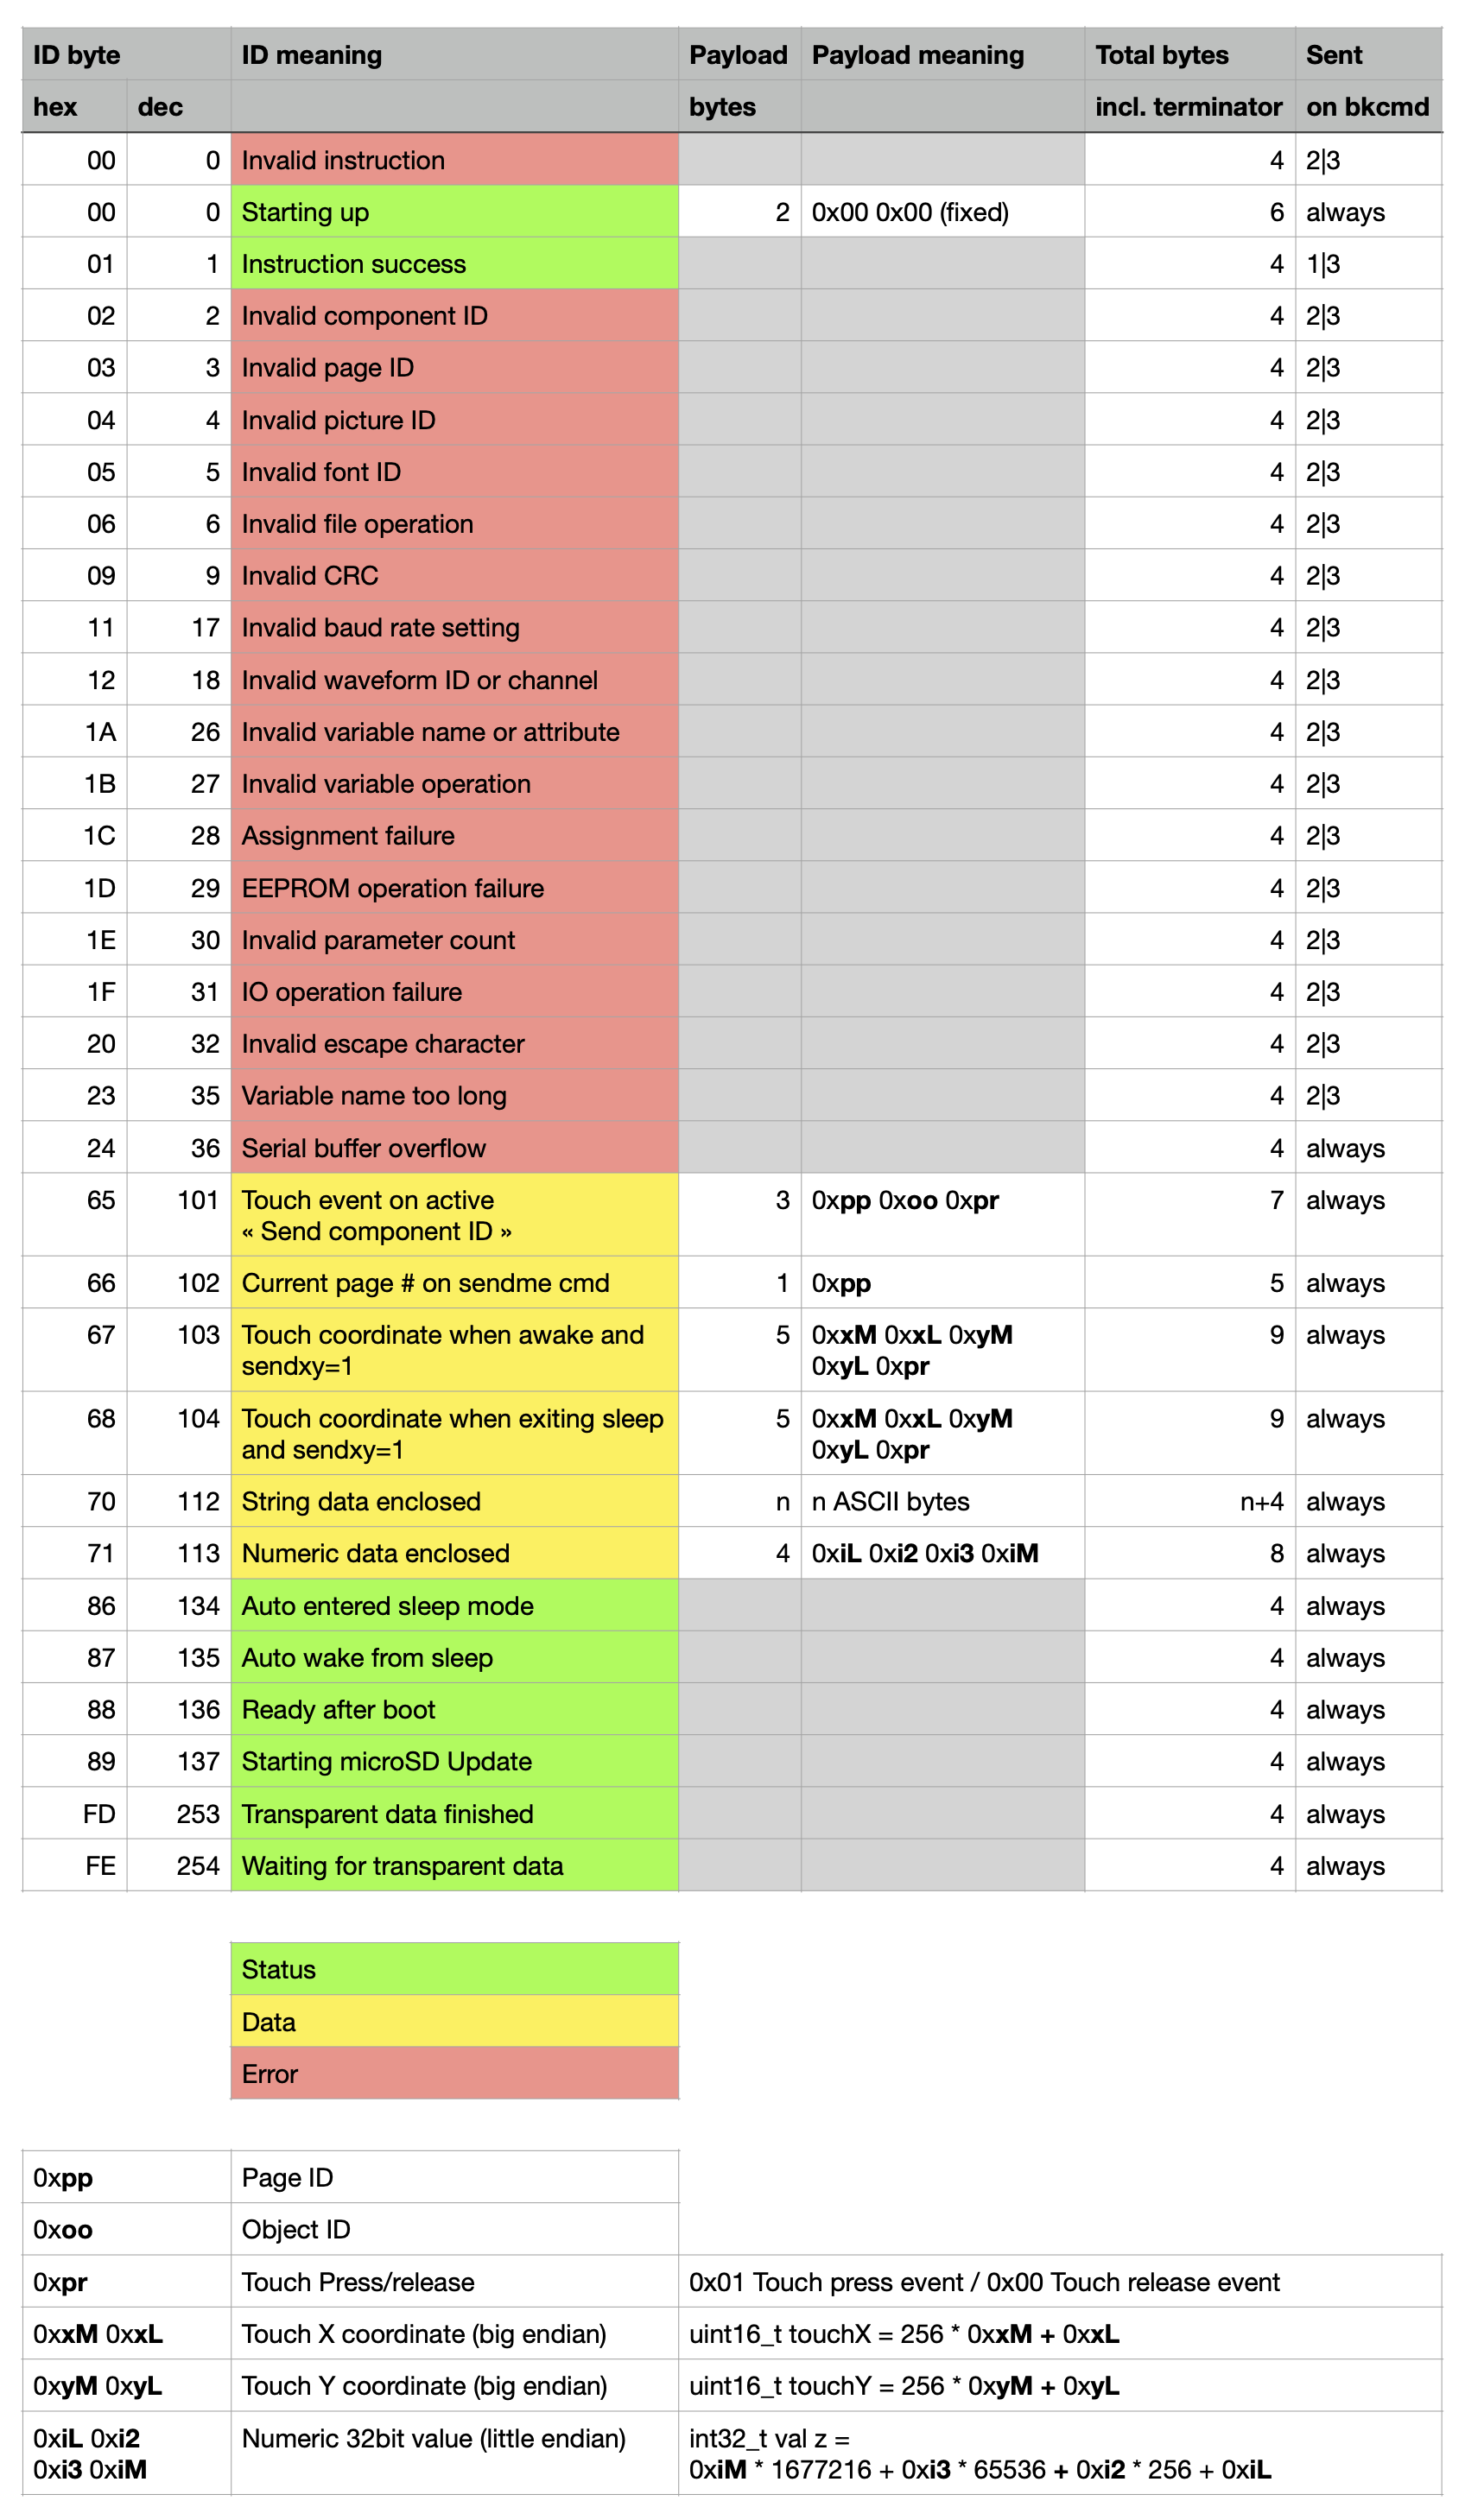
Before we can decode an incoming message, we have to know what kind of message it is (identification) and we have to make sure that it is complete (integrity). That’s why each return data from a Nextion HMI is preceded by an identification byte. A quick look into the Nextion Instruction Set (NIS) tells us that there are 32 different possible but not always consecutive ID bytes. So, if we find one of these at the beginning of the serial buffer u[0], we could think that we have identified the message type. But what if “by accident”, it’s not the beginning but a byte in the middle of a (previously) incomplete or corrupted message? To prevent such misinterpretation, we need to check also the data integrity. A second look into the NIS documentation tells us – with a few exceptions – that most messages are expected to have a defined fixed length.
…with exceptions…
The exceptions are String data (ID 0x70) which can have a variable length depending on the text length and encoding and the ambiguous 0x00 which is either an error code when immediately followed by the 0xFF 0xFF 0xFF terminator or a status code (“Starting up”) when followed by 0x00 0x00 before the terminator bytes occur. So, the latter will need some special handling while for the other 30 ID bytes, we know in advance that the message will have a total length of 4, 5, 7, 8, or 9 bytes respectively. A third look into the NIS tells us that all error messages and all status messages except the “Starting up” are 4 bytes long. This allows us for all ID bytes except 0x00, 0x65, 0x66, 0x67, 0x68, 0x70, and 0x71 to look at the second, third and fourth byte u[1,2,3] if these 3 are all 0xFF and thus to validate the error or status message, to decode and to display it. For 0x66, we should find the terminator in u[2,3,4] while the page ID will be found in u[1]. And so on. To make things easier, I compiled the Nextion Return Data chapter of the NIS into a simple spreadsheet (see below) to ease all this proceeding.
Special case: Text Data
A 0x70 in u[0] will tell us that the following bytes are all ASCII characters. Nice! But we can’t know in advance how many will follow. Thus, we’ll have to loop through the whole serial buffer until we find the 3 terminator bytes. With a bit of luck, the text length does not exceed1020 bytes, so that we’ll not have to copy the buffer, and empty it to allow the remaining text to come in and to start over the search for the terminator…
But what if…
… either the integrity check fails, even if we check both variants for ID 0x00, or a not listed byte is at the beginning? Basically, the only way is to look for the terminator bytes in a loop (as for text with unknown length), to discard everything up to there, and to display an error message, before we may (hopefully) find a valid byte sequence afterwards.
The complete Nextion return data spreadsheet
is now what will us allow to identify, validate, and to decode incoming Nextion return data. This, and the considerations above are the more or less detailed specifications for the code project that we’ll see here very soon in part 3 of this series.
Happy Nextioning!
P.S.: click on the picture below for a better readable full screen version!