Nextion Summer Sales with huge discounts and a nifty HMI animation project

Blogging about the Nextion Summer Sales and the generous discounts alone did not seem to me to be enough to satisfy my dear readers. Thus, I thought this could be a nice occasion to do a simple animated demo project which would run on all series and not only on the Intelligent series with their extended animation support. I decided for the NX4832F035 from the Discovery series, but the HMI file (you’ll find it as usual at the end of this article) can be compiled and uploaded on any Nextion HMI display having a 480×320 resolution, like the NX4832T035 or the NX4832K035, without any modification! Choosing a different screen size or resolution would require to rework the picture resources just a little.
Did I mention that, again as usual, I use today’s demo project as a showcase for a resource and memory saving approach? 1 single page and only 2 components (a timer and the QR code) combined with 3 picture resources and a handful of code lines make a nice commercial animation. The latter might not be very useful for anybody, but this project is rather intended to teach resource saving development. We’ll go into details below. But first, let us explore the Nextion Summer discounts:
The Nextion Summer discounts
This year, valid until August 31, 2023, there are two distinct discount mechanisms which can be combined:
First, if you order two (or more) Nextion items using this link (or the one in the HMI animation), you’ll automatically get 10% off your order!
Second, if the value of your order exceeds $199 (without the shipping cost), you’ll get another $20 off using again this link (or the one in the HMI animation) and the code NEXTION20 !
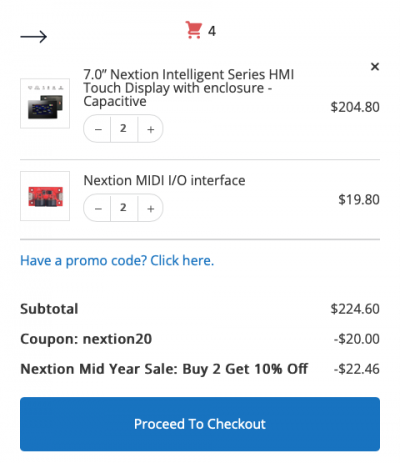
Both can be combined. Let’s look at an example: Imagine you want to buy two 7″ Intelligent Series Nextion HMI NX8048P070-011C-Y with enclosure à $102.40 each and, let’s say, two Nextion MIDI I/O Interface à $9.90, you’d normally see a cart subtotal of $224.60 but since you have more than 1 item in the cart, the 10% discount ( -$22.46) will automatically appear. Then, clicking onto “Have a promo code? Click here” allows you to enter the NEXTION20 code and you’ll see another -$20.00 off and check out with only $182.14 (plus shipping) which makes a total discount of $42.46 or 18.9%!
Now, to our project!
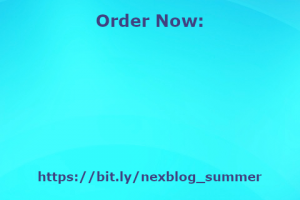
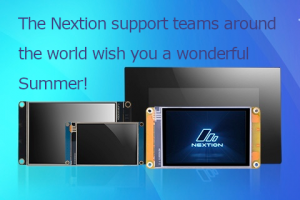
The idea was an animation to show 3 screens automatically cycling every 5 seconds: The first with the discount details, the second with an invitation to order and the corresponding link and QR code, and the third with a nice message. Like this:

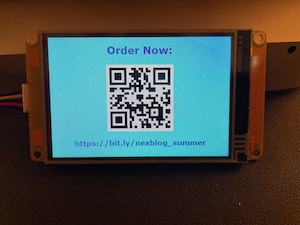

How to get this achieved with minimal resource consumption? Since the content is static, I saw no need to use different fonts, text and picture components. I used a pixel graphics program (The Gimp is what I personally prefer because it’s free, but Photoshop would have done the same job) to create three 480 x 320px picture resources like this:

I could basically have even generated the QR code with an appropriate tool and integrate it into the static picture resource, but I thought that it’s a nice occasion to demonstrate the existence of a QR code component and the way to show and hide components dynamically.
The first step of saving memory is to reduce the number of pages, then the number of components (in our case with the exception of the QR code component). Thus, I decided to plan all the action on a single page and using a timer to change the displayed static content on that single page. One of the most common beginner “errors” is then to place a huge full screen picture component on the (blank) page and to change its linked picture resource. Doing so is a waste of RAM for the large picture component, since the same picture resources can be displayed by the page itself.
To do so, you’ll have to set the page’s .sta attribute to “image”. Then, a new page attribute, .pic, will appear which will allow us to change the picture by code, later. For the moment, we set the .pic attribute of the page to 0, so that the first imported picture resource (Nextion Mid Year Sales Rules) will be displayed by default. Then, we place the QR code component and set its .txt attribute to https://bit.ly/nexblog_summer.
Since we do not want the QR code to appear by default, we hide it in the page’s PreInitialize event code:
vis qr0,0Now, we need still a timer with a 5000ms interval to handle the animation. First of all, it will use the system variable sys0 to cycle endlessly through the numbers 0, 1, and 2. This is done by incrementing sys0 by 1, then checking if it’s over 2 and in this case, subtracting 3 to return to zero. This value will then be used to set the page’s .pic attribute to the corresponding picture resource 0, 1 or 2.
Finally, another if() check allows us to show the QR code when sys0 is 1, and to hide it in all other cases:
sys0++
if(sys0>2)
{
  sys0-=3
}
if(sys0==1)
{
  vis qr0,1
}else
{
  vis qr0,0
}
page0.pic=sys0
And we are done and can compile and upload everything to our Nextion HMI display.
I’d wish that this minimalistic approach inspires you to realize nice things in your own projects!
Here, as promised, the .hmi file: summer23.HMI
Thank you for reading and happy Nextioning!
Questions, comments, critics, suggestions? Just send me an email to thierry (at) itead (dot) cc! 🙂
And, by the way, if you like what I write, and you are about to order Nextion stuff with Itead, please use my referral link! To you, it won’t make a change for your order. But it will pay me the one or the other beer or coffee. And that will motivate me to write more interesting blogs 😉


