Arduino listens to your HMI
Serial communication in practice – Part 1
Today is a very hot day, at least where I live. 34°C or 93°F outside and 29°C or 84°C inside my home office in a 400 years old house without A/C… Nevertheless, after two successful articles about the basics of serial communication, part 1 here and part 2 here, I didn’t want to leave it at the theory. Thus, today we move over to practice.
Simple communication without a library
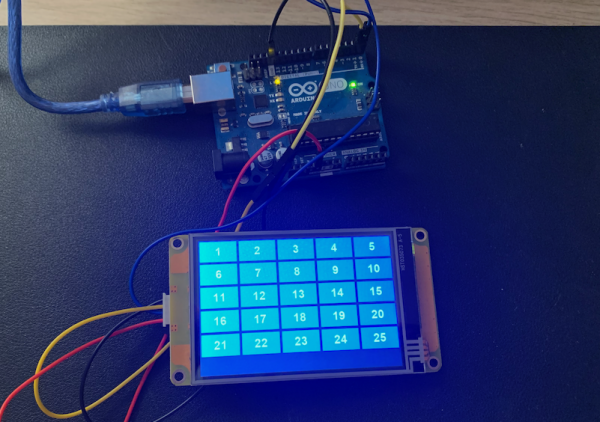
Having you Arduino listening to simple button presses does not forcibly require the use of a memory consuming library with a complex object hierarchy, a lot of listener list declarations and many #defines, as we will soon see. On the picture above, you will recognize a screen with 25 buttons. Each button will just have to send a single byte with a numerical value between 1 and 25, according the number of the button. Thus, we can be sure that the size of a transmission frame is constant at 1 byte, and the values are constrained to a defined range. This allows us to refrain from using a complex protocol with terminator bytes etc.
Summer heat leads to laziness leads to extremely efficient HMI programming…
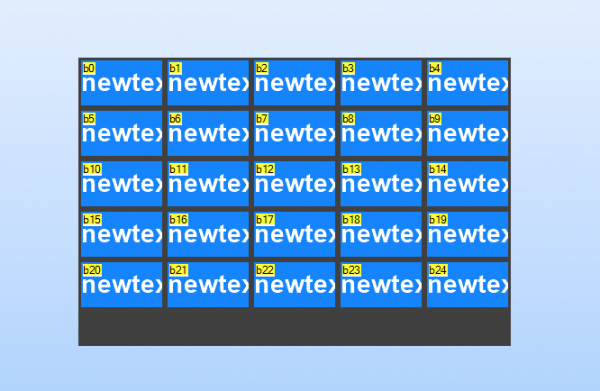
Placing 25 buttons on the page in the Nextion Editor is quickly done. After creating the first button and customizing just its size and colors, the copy/paste and the different screen alignment options allow to get a quick and easy result like this:
And that’s the moment where I said to myself: “You will not click on each button, then move over to the attribute pane, scroll down to the txt attribute and put a 1 for the first, repeat the action and put a 2 for the second, and so on! There must be a smarter way…”
I found it. Looking at the buttons’ object IDs, I saw that these corresponded exactly to the numbers I wanted to have in their text attributes. Thus, I put the following lines of code in the page postInitialize event code pane:
for(sys0=1;sys0<=25;sys0++)
{
  covx sys0,b[sys0].txt,0,0
}
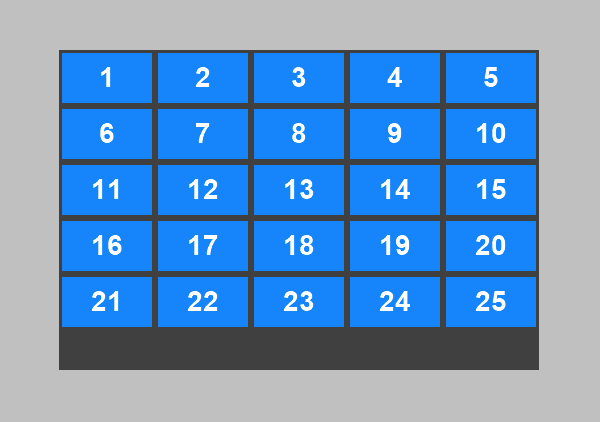
This code loops through the numbers from 1 to 25, uses the b[] component array to address the component with the corresponding object ID, and the covx function to transform the number directly into the text attribute. Why should I do 25 times the work by hand if the Nextion can do it by itself? 😉
After loading the page, the whole magic is there, look:
Is there also a short cut for the event code?
Yes, there is! Instead of clicking 25 buttons and entering manually the code to send the displayed number as a single byte over serial, we simply add a TouchCap component to our page. As its name says, it captures all touch (TouchPress and TouRelease) events on the page and allows to process these in a single place. As soon as a touch event happens, the TouchCap’s .val attribute will hold the object ID of the touched component (0 for the page itself). Then, the code in the TouchCap’s TouchPress (or TouchRelease) event code pane will be executed before the component’s own event code is executed. If, like in our case, everything can be handled by the TouchCap, there is even no more need for individual event code.
Thus, we simply put in the TouchCap’s TouchPress event code the following:
if(tc0.val>0&&tc0.val<tc0.id)
{
  prints tc0.val,1
}
The if() condition makes sure that the following code will only be executed if a button is pressed. Remember, the object IDs of the buttons are from 1 to 25, 0 being the page itself and 26 the TouchCap component, since it was added afterwards. Now that this has been checked, we can simply use the prints function to send the object ID in a single byte (thus the 1 as the second parameter) and we are done with the Nextion side.
Or, almost! In the very last moment, we remember that on boot, the Nextion will by default send 0x00 0x00 0x00 0xFF 0xFF 0xFF and 0x88 0xFF 0xFF 0xFF. This risks to lead to misinterpretations on the Arduino side, thus we’ll disable that function by simply commenting out the corresponding line in program.s as follows:
// printh 00 00 00 ff ff ff 88 ff ff ff//Output power on information to serial portNow, over to the Arduino
The Arduino has basically an easy life, in setup() we’ll just have to initialize the serial port. And in loop(), we’ll have to check if a byte has arrived and (for the demo) just to output some information on the serial monitor. In a “true” project, you should not do this, at least not when using an Arduino Uno, because everything sent to the serial monitor will also be sent to the Nextion whose serial buffer will eventually overflow. And that will be the moment where the Nextion fires back with error codes… Conclusion: The Serial.print() and Serial.println() lines in the code below should be replaced by meaningful code. But this is up to you and the specifications of your project.
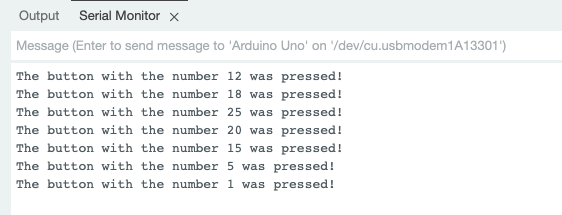
void setup() {
  // put your setup code here, to run once:
  Serial.begin(9600);
}

void loop() {
  // put your main code here, to run repeatedly:
  if (Serial.available()) {
    int c = Serial.read();
    // replace the following 3 lines with meaningful code to prevent a Nextion buffer overflow
    Serial.print("The button with the number ");
    Serial.print(c);
    Serial.println(" was pressed!");
  }
}
Wiring everything up and trying it out, you’ll get something like this on the serial monitor:
No need to redo everything manually, here is the .hmi file: button_arduino_demo.HMI
And here is the Arduino code: Nextio_button_demo
Thank you for reading and happy Nextioning!
Questions, comments, critics, suggestions? Just send me an email to thierry (at) itead (dot) cc! 🙂
And, by the way, if you like what I write, and you are about to order Nextion stuff with Itead, please use my referral link! To you, it won’t make a change for your order. But it will pay me the one or the other beer or coffee. And that will motivate me to write more interesting blogs 😉


