The Sunday Blog: The new factory demo
Hidden secrets
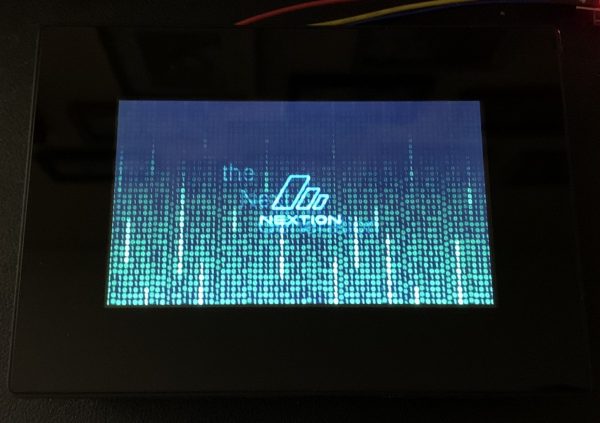
Each Nextion HMI comes with a factory demo preloaded. This demo has many functions. First of all, it serves as the very last step (of many) of quality control before leaving the factory, and thus proves that .tft files can be uploaded and run. Second, it is made to be an eye catcher, to demonstrate impressively many of the functions and capabilities of this specific Nextion HMI model or series.
From time to time, we update the factory demo, mostly to show new functionalities of new Editor or firmware releases. These firmware releases come as back pack with new editor versions. When you first compile and upload a file with a new editor release, you might see “Firmware will be upgraded” on your screen before the usual upload progress is shown.
This time, we even added a (not so hidden) secret! Telling you what it does and how you unhide it, requires a few explanations before.
How we make sure that you get a 100% working product
After many bed of nails tests during production, the last step of quality control is, as told above, that we upload the factory demo onto your future Nextion HMI before packing and shipping it. At this moment, we can be sure that the product is 100% working. Nevertheless, a few issues arose rarely when a display arrived at its destination. Mostly, it was about corrupted persistent settings like the baud rate, the brightness, the RTC, or EEPROM initialization. Nothing which couldn’t be rapidly corrected with the needed Nextion programming knowledge and the help of our support system and forums, but often, new and unexperienced customers suspected a defective device, although the brightness setting had only jumped to zero. In other cases, accessing the RTC (on the Enhanced and Intelligent series) or the EEPROM could cause a crash because of a date and time setting which had become invalid or a EEPROM memory cell reading NaN (Not a Number) instead of a value between 0 and 255.
Yes, X-rays at border and customs control may alter the content of flash memory. And so can gamma radiation, too, when your Nextion HMI is shipped via airplane. And all that can happen in rare cases, even though everything was still perfect in our distribution warehouse in Shenzhen.
Avoiding bad surprises
Although we are talking about extremely rare cases, we were looking for a way to avoid bad surprises, hassle, and disappointment when unpacking your brand new Nextion HMI. So, we added a self diagnose at startup to the factory demo. In more than 99.9% of cases, you even won’t see it because it finds everything ok and starts the visual demo screens as expected.
But if a memory corruption problem is found, it will be silently fixed and then, the diagnose / fault screen will displayed as follows:
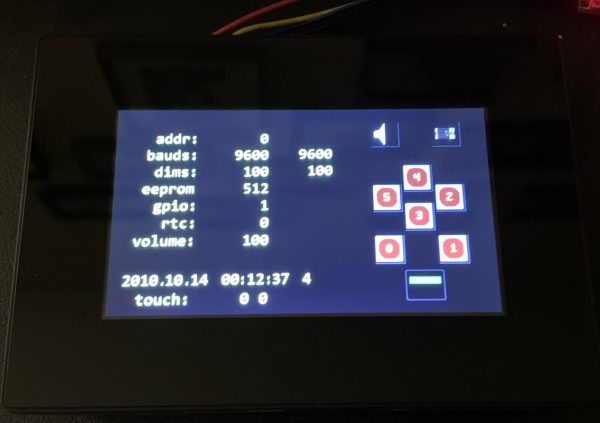
After fixing potential problems, it will confirm that
- address mode is reset to 0,
- the baud rate is reset to 9600,
- the brightness is reset to 100,
- the EEPROM is initialized,
- the RTC contains a valid date and time setting,
- and much more.
In addition, you will be able to check the touch calibration simply by viewing the coordinates when you touch the screen. It should always be correct on capacitive touch models. But it could be lost on resistive models. On these, the caption “touch:” is replaced by “touch_j”. Clicking on it (or a little aside, depending on the coordinate deviation which you found during the check) launches a touch calibration cycle before restarting the demo.
On the Enhanced and Intelligent series, even the 8 GPIO lines can be checked, best by connecting the Nextion I/O Extension board. Pressing one of the 6 keys for the GPIO 0 to 5 lines will highlight the corresponding field on the screen. And by touching the corresponding symbols above, you can activate either the LED (GPIO6) or the buzzer (GPIO7) on the extension board.
Don’t panic!
Now that you have read this, you have already understood that when this diagnose / fault screen appears by itself, a problem was detected, but it was also already automatically fixed. There is really no need to panic!
How to get this screen manually?
I will answer the question before you ask it: Since the diagnose / fault screen brings much more than just confirming that all relevant system data is valid, it can be interesting to launch this screen even without having a specific problem, be it for example to check the GPIO lines or the touch calibration. So, we built in two ways to manually trigger this screen without having to corrupt system data.
First, on the Enhanced and Intelligent series models, simply pull GPIO0 low before powering the display and maintain it low until the diagnose screen appears.
Second, on all models, touch the screen within 5 seconds after powering up and the factory demo starts. The diagnose screen will then appear after the first demo page.
Last but not least…
Please understand that the diagnose / fault screen is part of the factory demo and it will be gone forever as soon as you upload another .tft file! But you should know that the whole factory demo, including the diagnose screen and code has been written in Nextion language, only using commands and functions which are documented in the Nextion Instruction Set document. So, you might reproduce everything which you see and like in the demo.
Thank you for reading – happy Nextioning!


