The Sunday Blog: Talking to your Nextion HMI
Part 2: Nextion HMI vs Standard TFT
In the first episode of this blog series, we learnt about serial communication in general and how it developed and became a standard, historically. Today, we will have a more in-depth look into the Nextion HMI’s principle of operation, and do so partly by comparing the Nextion HMI with the use of a standard TFT in common MCU (Arduino) projects.
The standard display approach
The day will come where your Arduino (or PIC or STM or whatever MCU) projects will become more and more complex, and the few buttons and LEDs, wired to numerous pins of your Arduino will not longer allow an ergonomic Human-Machine-Interaction (HMI). Your project asks for a nifty and touch sensitive GUI, which shall at the same time display text and data from the Arduino to the user, and a few controls, for example knobs and sliders, so that the human can talk back to the project. You need a touch sensitive color display. After a bit of thinking, you decide that you want a TFT LCD display with touch function and you start hunting…
You’ll end up with your desired TFT LCD display with touch function, and probably a breakout board for your MCU. That’s the hardware side. On the software side, you’ll need drivers for the LCD controller, i.e. ILI9341, and for the touch controller, i.e. XPT2046. Then you’ll need a TFT library which will require a gfx library and a SPI library, and a Touch library. So, your .ino file will start with a long list of includes, and if you managed to find and install all these libraries and if they are all up to date and compatible, odds are good that your project compiles.
In the next step, you’ll initialize the TFT object and the Touch object, indicating the selected SPI port, the corresponding MISO, MOSI, CS, CLK and Interrupt pins.
UTFT myGLCD(ILI9341,38,39,40,41);
URTouch myTouch( 6, 5, 4, 3, 2);
Try to compile again, if the parameters are all correct and fit with your selected hardware, it will again pass without errors. But you’ll see that although not a single character was send to the LCD, a huge amount of the available Flash ROM and RAM will already been used. You are still in good mood.
You plan to output a simple Text, i.e. “Hello world” in white letters on a blue background. Looking at some example code, you write a few corresponding lines, like
myGLCD.setBackColor(0,0,96);
myGLCD.clrScr();
myGLCD.setColor(255, 255, 255);
myGLCD.setFont(BigFont);
myGLCD.print("Hello world", CENTER);
That won’t compile at the first attempt. The compiler will complain about the undefined variable “BigFont”. After browsing through some online documentation, you learn that you have to reference the font definition as an external file containing a heavy callback function:
extern uint8_t BigFont[];
Now it compiles, but you are probably upset because after including the font definition, even less free RAM and flash memory are left over. And you haven’t even started dealing with the touch interface or writing the main program…
What happens behind the scenes?
The setBackColor() function will address the background color register (one command and two address bytes) to write the color value (2 or 3 bytes). The clrScr() function will then trigger the TFT controller to fill each of its 76800 pixel buffer memory cells of the with the background color value (2 oder 3 bytes) which makes 153600 bytes in the best case. Then, the setColor() and the setFont() functions will prepare the library for the print() operation, which consists rendering the string (11 characters, 16 pixel wide and 32 pixel high = 5632 pixels) in your MCU’s RAM, calculate the start coordinates, so that the spacing right and left is equal (remember, you wanted it centered) an then send over the corresponding 11264 bytes plus some command and address bytes to the TFT.
Pretty much work and huge usage of MCU resources for almost nothing, isn’t it? We’ll stop that analysis here. The handling of touch events is similarly complicated, believe me: Each time you touch the screen, the Touch controller triggers an interrupt. An interrupt handler (part of the touch library) sends then a command to the touch controller, requesting the touch coordinates and catching the return. It’s then up to your code to look up, which part of the screen has been touched (from the x and y coordinates), if these match a specific coordinate range and if action (which?) has to be taken.
What if most of these time and MCU resource consuming tasks could be externalized? It’s possible! Lets have a look at…
The Nextion HMI approach
Basically, the Nextion HMI is nothing other than a standard TFT, combined with its own MCU, running a sophisticated firmware which you create quickly in the free Nextion Editor with a few mouse clicks. No hassle with drivers and libraries, no lengthy and slow transmission of single pixel data, just a few commands to send ASCII text over serial, and you are done. Let’s look at this proceeding step by step:
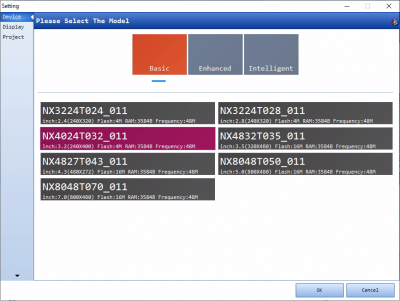
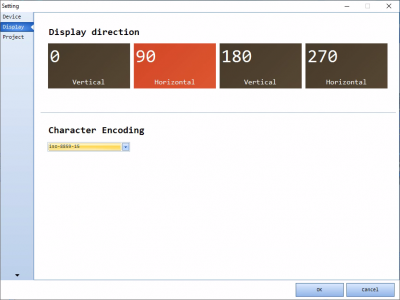
1. Launch the Nextion Editor, start a new project, set the display type, size, and orientation:
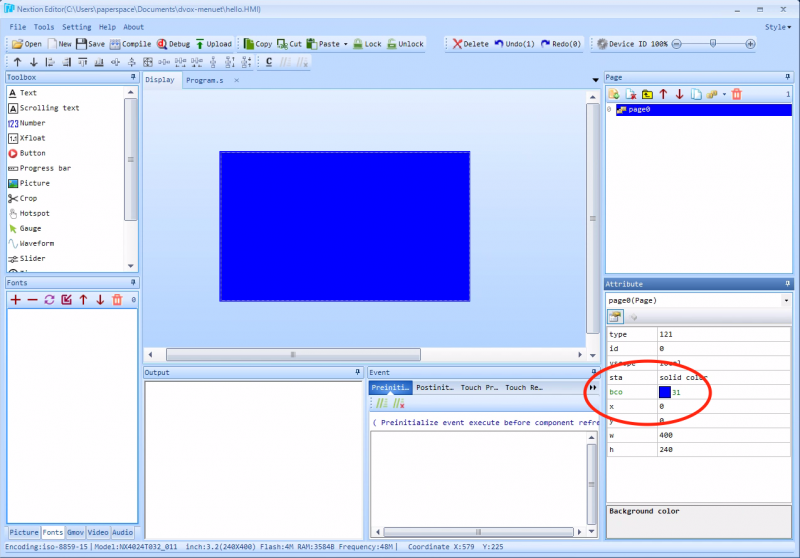
2. See the display on the canvas of the editor and set the background color to blue
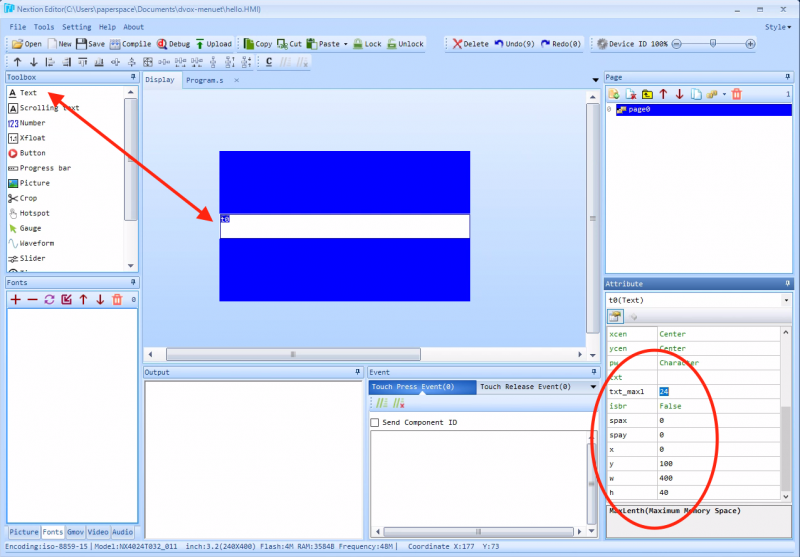
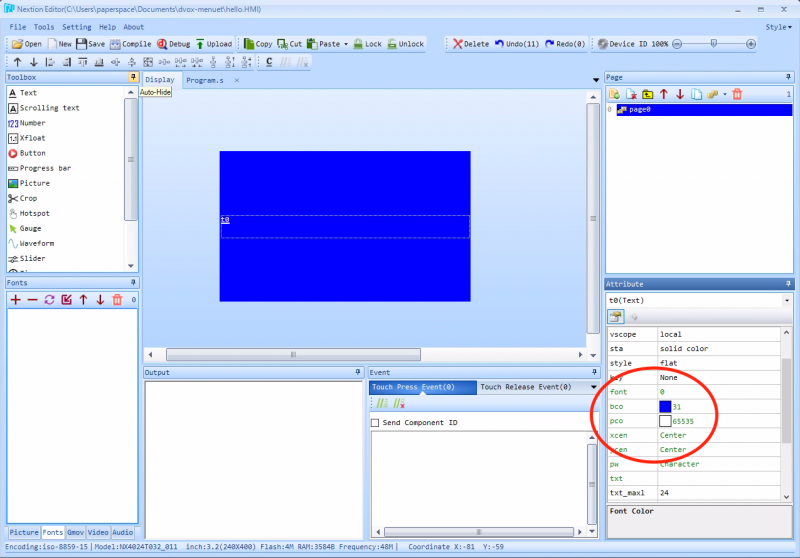
3. Add a text component and place it on the screen.
Set its txt attribute to empty (clear the default “newtxt”) and set the x,y,w, and h coordinates according to the screenshot below:
Adjust the text component’s background color and plot color accordingly :
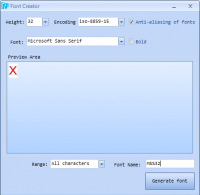
4. Generate an appropriate font by launching the font generator from the Tools menu and add it to the project:
5. Ready! Compile and test everything in the simulator by clicking the Debug button:
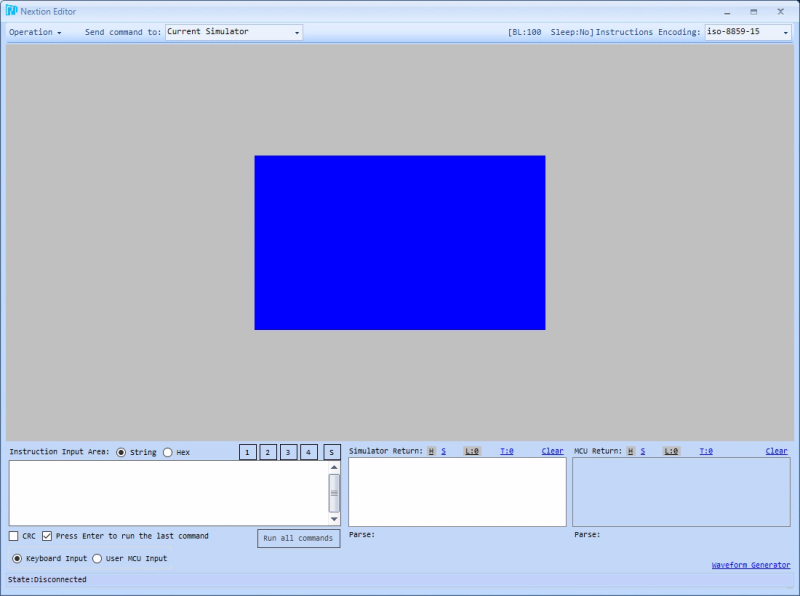
Now, let’s use the instruction input area, if our just generated firmware works as expected:
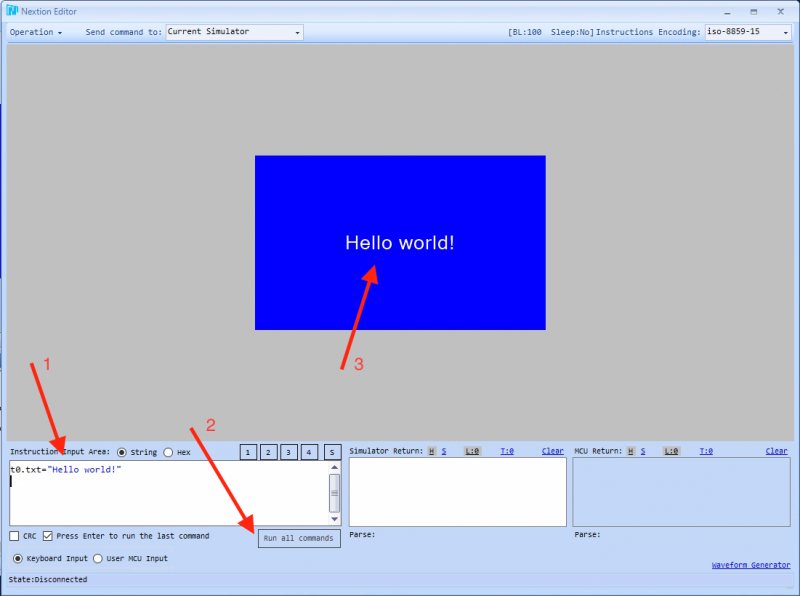
By entering one single line, containing an assignation between a component’s attribute and the content, our task is done. All the complicated stuff is handled internally by the Nextion HMI’s internal MCU. Once the firmware (which you just generated with a few mouse clicks) uploaded into your Nextion, your Arduino has nothing to do but sending the same command which you typed by hand over Serial.
We’ll look at that in the next episode.


