Professional HMI project design
Step 2: Animation and timing
In my previous blog article, we started explaining all the steps required from the first idea at the beginning until assembling everything at the end to realize a Nextion HMI project systematically, and successfully. I choose the example of a slot machine which is going to be emulated on a Discovery Series Screen but all the hints and examples in this article series might be used or adapted for numerous other use cases. In the first part, we analyzed the principle of operation of such a machine, and we made a huge excursion in game theory which is mostly mathematics, to set up a winning probability and reward redistribution strategy. While it would be (still mathematically) sufficient, to generate a 3 digit ra
ndom number within milliseconds, check if all three digits are equal and output a reward (or not), this would be nothing to attract any gambler – we need a gameplay, made of action strategy, timing, and animation. And that’s today’s topic.
The game strategy and timing
Always look back at the original: A slot machine has a leaver or button which allows to trigger the wheels’ spinning. But these won’t spin forever. After a timeout, they will progressively slow down and eventually stop. More sophisticated machines allow the player to use the leaver or button to trigger the slow down and stop process even before the timeout occurs. But also not unconditional – the wheels have to spin for a minimum time.
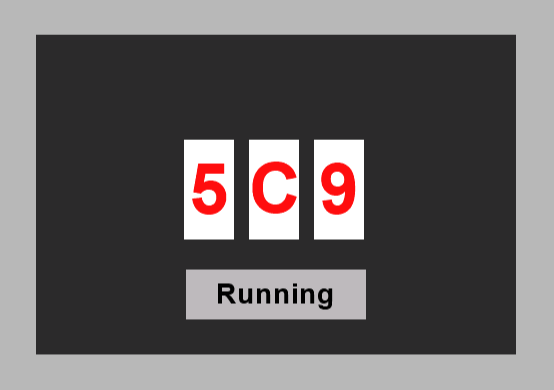
In our HMI project, the spinning at full speed is simulated by displaying random numbers which change every 80ms (variable tim_default), triggered by a timer (see the video above). Slowing down will be simulated by the timer adding repeatedly 30ms (variable tim_add) to its own timer interval until it becomes greater than 500ms (variable tim_stop) which gives the impression of slowing down until very slow spinning. Then, the timer will simply disable itself.
Now, we need the additional conditions for the minimum and maximum spinning times. It’s sufficient to have a variable tim_ticks incremented each time the timer fires because it’s only relevant while the virtual wheels are spinning at full speed, which means that we have 80ms ticks. If we want a minimum spinning time of 10s, this would be 125 ticks (variable tim_min). And the maximum spinning time (timeout) after 30s or 375 ticks (variable tim_max). Up to now, everything is pretty straightforward.
The slowing down (and finally stop) phase will occur either when the timeout occurs (more than 375 timer ticks), or when the player presses the start/stop button before. But in that latter case, the full speed spinning phase must take the minimum time of 125 timer ticks, though, and we’ll have to keep in memory the stop request by the player until this minimum time has elapsed. To make things not over-complex, we use simply another variable, slow_down, which will simply hold any stop request, either through the player’s interaction or after the timeout occurring, and delay if needed the slowing down.
In the timer event code, we’ll just have to check the double condition (slow_down>0&&tim_ticks>tim_min) to decide if the the timer’s interval should be incremented by tim_add. And for the timeout, its still simpler. we check the condition (tim_ticks>tim_max) to decide if the code should set slow_down to 1.
To keep our code flexible, we pack all these parameters and variables in the header file, program.s, as follows:
int tim_default=80,tim_min=125,tim_max=375,tim_add=30,tim_stop=500,tim_ticks=0,slow_down=0The animation
Let’s remember from last time, we wanted to have virtual wheels with the numbers 0 to 9 and the letters A to F. Thus, the animation consists in generating and displaying a random hexadezimal number between 0x000 (decimal 0) and 0xFFF (decimal 4095) at each timer tick. It will have to be converted into a text variable with the covx function, using 2 for HEX as the last parameter and then displayed in 3 separate 1 letter wide text components t0, t1, t2 (the wheel windows) with the help of the substr function. With this and the previous paragraph, we have the full timer event code :
// generate a 3 digit hex random number and convert to text
result=rand
covx result,t_buf.txt,4,2
// display the singe digits in the corresponding text components
substr t_buf.txt,t0.txt,1,1
substr t_buf.txt,t1.txt,2,1
substr t_buf.txt,t2.txt,3,1
// increment the virtual clock
tim_ticks++
// check if spinning longer than timeout
if(tim_ticks>tim_max)
{
  // automatic stop condition after timeout
  slow_down=1
  b0.txt="Stopping"
}
// check for slow down request
if(slow_down>0&&tim_ticks>tim_min)
{
  // slow_down requested and min time elapsed => decrease speed
  tm0.tim+=tim_add
}
if(tm0.tim>tim_stop)
{
  // if too slow, stop fully
  tm0.en=0
  b0.txt="Start"
  // todo: Check result here (code snippet from last blog)
}
The interaction
The player does mainly interact with the start/stop button. If the wheels are not spinning (tim0.en=0) it will act as start button and initialize all required variables before enabling the timer which will then take over and handle everything with the above code. But if the wheels are already spinning, it will launch a stop request by simply setting the slow_down variable to 1. It’s the timer event code which will then delay the request if needed in case the minimum spinning time isn’t yet over, and then pulling the handbrake by repetitively increasing its own interval until the stop condition is reached.
if(tm0.en==0)
{
  // wheels are not spinning, we may start
  randset 0,4095 // 12bit range
  slow_down=0
  tm0.tim=tim_default
  tim_ticks=0
  tm0.en=1
  b0.txt="Running"
}else
{
  // start slowing down
  slow_down=1
  b0.txt="Stopping"
}
And again, we see that analyzing, modeling, and optimizing everything first at an abstract level makes efficient coding a children’s game afterwards, since you have only to “translate” the algorithm in the appropriate language, be it Javascript, Python, or Nextion language.
Now that we have a running motor, we’ll have still to add wheels and a chassis, which means in the next article, we’ll add a nifty GUI and assemble everything.
Thank you for reading and happy Nextioning!
Comments, critics, suggestions? Just send me an email to thierry (at) itead (dot) cc! 🙂


