Advanced Programming
Computing square roots

First of all, let’s open a virtual bottle of Champaign – this is my 100st Sunday Blog post!!! Now, let’s celebrate this with a new functionality: Have your Nextion HMI computing square roots with just 21 lines of code and 5 integer variable components, everything nicely packed in a ready-to-use page template – the Nextion equivalent of a library as seen over the last weeks. The advantage is that you can add this function to a page by designing the latter by starting with importing the appropriate template and then customizing it as you would any other page of your project. And if your project doesn’t need it – let it away and save memory! In my humble opinion, that’s a way more interesting solution than requesting the integration of everything into the firmware, with all the runtime memory constraints.
“Why would a Nextion HMI project require the computation of square roots?” could one ask. The answer is simple: There are definitively use cases:
– Imagine that you track a voltage and display it with a complex waveform component. Wouldn’t it be nice to calculate its effective RMS value? After adding up the squares of each sample, a square root operation is required.
– Or think of some geometric touch operations: You need the distance between two arbitrary points on the screen. You’ll have to sum the squared delta x and delta y values and – again – to compute the square root.
Thus, I guess that this function will come in handy in many advanced HMI projects.
The theory
I won’t annoy you with a 4 hours long mathematics lecture. Let’s just say that we are using an algorithm which uses a similar method as you’d use to divide one number by another with paper and pencil. There, you advance digit by digit with respect to a remainder which might be leftover from the previous digit operation. The huge advantage for us is that if we (or our CPU) handle everything in binary digits, only additions and subtractions (which our Nextion masters perfectly) are required. Eventual Multiplications and Divisions can be simplified to bitwise shifting operations towards the left or the right, another thing which we have already in our Nextion language toolbox. Thus, the code is simple, quick, and efficient – as said above, 21 lines in Nextion language. And so, we can concentrate on the implementation:
It should be clear that the number from which we want to compute the square root is stored in a numeric variable. This might be a variable component, a number component, or even a xfloat component. The same applies to the result. Ideally, our code would be reusable, which means that it should be able to take the input value from different places and be able to save the result in different places. For this, we use indirect addressing. That is like passing function arguments by reference. Thus, before executing the code, we have to tell it where it finds the operand and where it as to deliver the result. Two of the five variables in our template handle this. We’ll have to set the variable s_id_in to the id of the component which contains the operand and s_id_out to the id of the component where the result shall be stored. Then, our code can access these using b[s_id_in.val].val and b[s_id_out.val].val and there is no more need to know if this .val is from a variable, a number, or a xfloat (.val is .val).
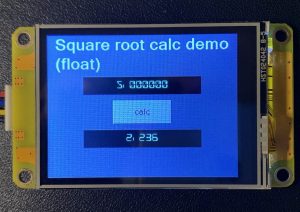
The only point where we have to take care are our xfloats. We must keep in mind that the square root of a number with n decimals has only n/2 decimals. That’s basically the same as with integers, a n-digit integer as a square root with a maximum of n/2 digits. In our example project with floats, you’ll see that x0 which carries the operand has 6 decimals while x1, the result, has only three. That’s something which we have to handle beforehand with the .ws1 attribute to get everything correctly computed and displayed.
The implementation
The core code is in a hidden hotspot called f_sqrt in our page template. Thus, calling the function means to initialize the references to the operand and the result, before we programmatically click that hotspot. Looking at our 2 demo projects, it’s pretty similar, one time, the references are xfloat components, and the other time number components. The rest is the same:
float demo – calc button event code
s_id_in.val=x0.id // set reference to input field
s_id_out.val=x1.id // set reference to output field
click f_sqrt,1 // call the square root function
integer demo – calc button event code
s_id_in.val=n0.id // set reference to input field
s_id_out.val=n1.id // set reference to output field
click f_sqrt,1 // call the square root function
The real “work” is then done behind the scenes in the f_sqrt hotspot’s event code – the famous 21 lines:
s_x.val=b[s_id_in.val].val
b[s_id_out.val].val=0
s_d.val=1<<30
while(s_d.val>b[s_id_in.val].val)
{
  s_d.val>>=2 //jump leading zeros
}
while(s_d.val!=0)
{
  s_t.val=b[s_id_out.val].val+s_d.val
  if(s_x.val>=s_t.val)
  {
    s_x.val-=s_t.val
    b[s_id_out.val].val>>=1
    b[s_id_out.val].val+=s_d.val
  }else
  {
    b[s_id_out.val].val>>=1
  }
  s_d.val>>=2
}
And here, we see the reason of existence of the other 3 numeric variable components, s_x, s_d, and s_t: These are used as temporary variables for intermediate results (s_x and s_t) and for the iteration control (s_d).
In practice: The demo projects
Both demo projects have been created in the same way: Start a new project, select screen type, size, orientation and encoding, then import our “container”, the page template sqrt_tpl.page
Since this will be our new start page, we’ll delete the blank page0 in the page pane. Then, we’ll customize our template based page by adding the required fonts, two Number or Xfloat components and a calc button to which we add the three lines of event code as above, and we are done.
If instead, you prefer using the prefabricated demo files, here they are:
sqrt_int_demo.HMI
sqrt_float_demo.HMI
Use them to taste, for playing and studying in the simulator, or in your own projects.
Happy Nextioning!


