The Sunday Blog
Nextion HMI as a FM stereo receiver with RDS controller

Today, after more than 60 Sunday blogs in a little more than a year, most times with demo projects to show new functionalities and advanced programming techniques, I feel that the moment has come to not only show my own – rather “pedagogic” – stuff loaded with lots of theory, but to present, at least from time to time, “real world” projects.
One of these is a full fledged FM stereo receiver with RDS and 2x3W audio output, quick and easy to build by assembling
– Nextion 3.5″ Enhanced Series HMI
– Arduino Nano
– RDA5807 (single chip FM receiver with I2C control) breakout module
– PAM8403 (2x3W class D amplifier) breakout module
It has been developed by the French Nextion user and HAM radio amateur Dimitri (F5SWB) who lives only around 45 miles or 70km from my place. He hasn’t re-invented the wheel, though, he made a very intelligent selection of pre-build hardware modules to minimize the wiring effort, and software libraries to reduce the complexity of the code.
The hardware:

The RDA5807 is a single-chip FM receiver in a small MSOP-10 pin housing. Inside, we find an analog RF front-end, a digitally controlled synthesizer, a multiphase mixer and an IQ-demodulator coupled with a DSP to de-multiplex the stereo audio signal and the RDS information. Everything is controlled via a 2-Wire I2C bus. Since our Nextion HMIs “speak” only UART (TTL serial), the Arduino Nano as “the man in the middle” will do the translation required to having the Nextion HMI and the RDA5807 talk between them. This setup allows to control everything (tuning, seeking, station presets, mono/stereo switching, volume etc.) and to display everything (signal strength, station name, extended RDS information, etc.) with our Nextion NX4832K035!
Only one more, the fourth building block is required to amplify the rather weak audio signal of the RDA5807 (modest headphone level) to drive speakers. Dimitri selected the 2x3W class D (no cooling required!) amplifier PAM8403. This IC, like the RDA5807M, exists only in a SMD housing. If you aren’t comfortable with creating your own PCB layout and with soldering SMD components, that’s not a problem. Breadboard-friendly breakout modules exist for both and can be found on most platforms. RDA5807M modules can be bought on AliExpress for less than $3, shipping included, PAM8403 modules for less than $2, and an Arduino Nano (clone) for less than $4!
If we are lucky and can pull the Nextion NX4832K035 out of our drawer, the whole project can be done for less than $10 and is thus pocket-money compatible.
The wiring is simple and pretty straightforward. Apply +5V from the (USB powered) Nano to the Nextion and the PAM8403 module, 3.3V from the Nano to the RDA5807 module, and GND to all components, link the Nextion’s RX and TX to the Nano’s TX and RX, link the Nano’s SDA (A4) and SCK (A5) to the corresponding pins 1 and 2 of the RDA5807 module, the audio outputs of the RDA5807 (7,8) to the inputs of the PAM8403, hook up a pair of speakers and a telescopic antenna or – at least for a first check – a 70cm/28″ wire, and you are done.
Detailed wiring instructions with pictures are on Dimitri’s Github project page.
The software
Everything can also be found on Dimitri’s aforementioned Github page. The quickest and easiest way is to take the readily compiled .tft file from there and to upload it directly to the Nextion. Later, when you feel the wish to modify the interface, you can take the uncompiled .hmi file, make additions and/or changes, compile and upload it (again) with the Nextion editor.
The Arduino sketch (the .ino file) needs to be opened, compiled and uploaded in the Arduino IDE. Dimitri was so friendly and helpful to also add the two required “external” libraries, EasyNextionLibrary.h and RDA5807.h. While the former is a lightweight library to handle the communication between Arduino and Nextion, the latter is a wrapper which handles the I2C communication with the RDA5807M (as the name says). This saves us from having to study and learn how to control the FM receiver chip over I2C, which is mostly done by setting and clearing bits in the 16 16bit control registers. Instead, we have a nice API with a “rx” object which allows calling all functions with easily understandable names like rx.setup(); rx.getRealFrequency(); and so on.
And we are done with programming everything.
The interface
… is ergonomic and pretty self explaining:
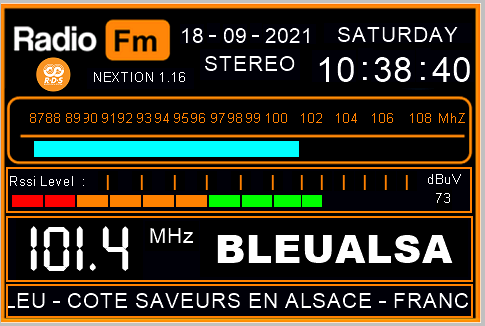
Touching the “FM” clipart opens the setting page:
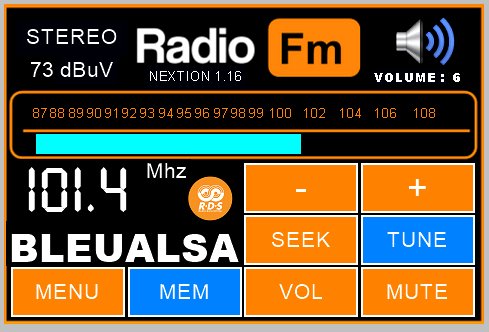
And so on, there are more screens for handling time and date settings, display brightness, memory presets – discover and have fun!
A huge “Thank you, Dimitri” in the name of the whole Nextion community for this well thought and easy to build project – continue the good work!


