The Sunday Blog: Scalable design and gaming
Part 2: Let’s build the game and gamble!
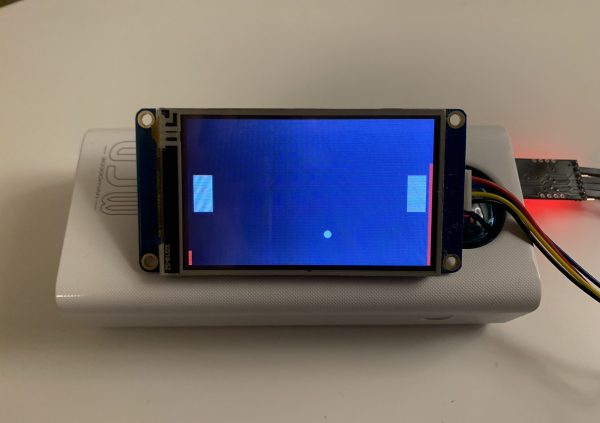
After a highly theoretic blog article last Sunday (huge thanks to all readers who made it through it), it’s now time to apply everything in practice. So, let’s build the project in the Nextion Editor. Those who fear copying and pasting a little less than 150 lines of commented code may download the ready-to-use .hmi file below. The pedagogic principle behind this blog is to teach how your HMI designs can be made scalable, able to run on different screen sizes and resolutions, with no or at least a minimum of modifications. Some component attributes (like x, y, h, and w) are immutable at runtime, so these need to be set “by hand” beforehand. But all what can be done in code will be done in code. At the same time, we need to reduce the CPU time for calculating and drawing the ball movement and the check for bouncing. Thus, we will make use of some pre-calculated helper vars.
For example, when we have a ball with a radius of 6 pixels, when does it touch the upper screen border? No, not when the ball’s center y-coordinate is 0, but when it equals the radius. So, for top and bottom bouncing, we can pre-calculate 0 + ball radius as the upper compare value for the ball’s center y, and page height – ball radius as the lower one. We’ll see more details below.
First, the page design
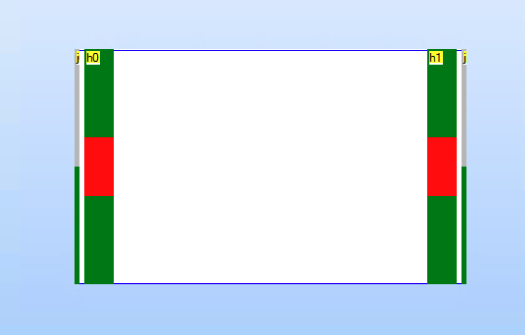
Rather easy-peasy, we’ll have to place…
– a full-height 5px wide vertical progress bar j0 at x=0 as score indicator
– a full-height 30px wide vertical slider h0 at x=10 as racket
– a full-height 30px wide vertical slider h1 at x=max-40 as racket
– a full-height 5px wide vertical progress bar j1 at x=max-10 as score indicator
– a timer tm0
Don’t care about colors and other attributes, they’ll all be set in code. The result should look like this:
Then, the program.s file
Here, we define all needed variables and set a few constants for the foreground and background colors and a highlight color for the score display progress bars.
// Declare variables and initialize the less dynamic ones
int ball_rad,ball_x,ball_y,new_x,new_y // ball coordinates (buffered)
int vect_x,vect_y // movement control
int tmp_b,tmp_t // tmp helper vars for bouncing at the sliders/rackets
int min_x,max_x,min_y,max_y // permanent boundary helper vars for quicker bouncing check
int min_out,max_out // permanent boundary helper vars for "ball out"
int bco=12678 // background color
int pco=65535 // foreground color
int hlt=63488 // highlight color
page 0 // start the game
In this file, we can’t yet start any calculation, since we need the page height and width for that, but these aren’t available as long as no page is loaded. An when a page is loaded, program.s does not longer execute. So, all that scaling and initializing will go into…
The page Post Initialization Event code
This is the place to put everything which depends on the page format: Setting the ball radius, the racket size, boundaries, colors, initial positions, and finally start the game by enabling the timer. We set the racket height (the .hig attribute of the sliders) to 1/4 of the page height and the maxval to the remainder. This has the advantage that the slider’s .val attribute always corresponds to the lower end of the racket (seen from the screen bottom) and (.val + .hig) to the upper end. Since the Nextion counts the y coordinates from the top, we’ll have to do subtractions from page.h later in the timer event code – that’s what the helpers tmp_b and tmp_t are for, to get the absolute y coordinates of the respective rackets to check if the ball will be hit back or if it goes out.
// Configure the page
page0.bco=bco
// Configure the timer
tm0.en=0
tm0.tim=50
// initialize variables depending on screen dimensions
ball_rad=page0.h/40
min_out=h0.x+ball_rad // left boundary if ball has not been hit back
min_x=h0.x+h0.w+ball_rad // left boundary if ball has been hit back
max_out=h1.x+h1.w-ball_rad // right boundary if ball has not been hit back
max_x=h1.x-ball_rad-1 // right boundary if ball has been hit back
min_y=ball_rad // top boundary
max_y=page0.h-ball_rad-1 // bottom boundary
// configure left racket
h0.bco=bco
h0.pco=pco
h0.hig=page0.h/4 // racket height
h0.minval=0
h0.maxval=page0.h-h0.hig // page height - racket height
h0.val=h0.maxval/2 // center position at start
// configure right racket
h1.bco=bco
h1.pco=pco
h1.hig=page0.h/4 // racket height
h1.minval=0
h1.maxval=page0.h-h1.hig // page height - racket height
h1.val=h0.maxval/2 // center position at start
// configure left result progress
j0.bco=bco
j0.pco=hlt
// configure right result progress
j1.bco=bco
j1.pco=hlt
// configure speed
vect_x=page0.w/2-h0.x-h0.w/24
vect_y=page0.h/80
// start over
j0.val=0
j1.val=0
ball_x=page0.w/2
ball_y=page0.h/2
cirs ball_x,ball_y,ball_rad,pco
delay=1000
tm0.en=1
Let’s move
The timer event code is responsible for moving, bouncing, and deciding if the ball is hit back or goes out, depending on the slider positions. This code should execute as quickly as possible to allow a visually fluid ball movement. After a ball goes out, the corresponding score counter is increased and then it’s thrown in again from the middle of the screen. If one of the score counters bars reaches full height, the game is over and starts again by reloading the page. Note that sometimes a combination of conditions has to be checked, the nesting of the if() clauses has been done in an optimized way, so that if the main condition is already not met, further conditions will not be evaluated to save CPU cycles at runtime.
//calculate movement step
new_x=ball_x+vect_x
new_y=ball_y+vect_y
// handle fails
if(new_x<=min_out)
{
  j0.val+=10
  if(j0.val>=100)
  {
    // reset
    tm0.en=0
    page 0
  }else
  {
    // next round
    new_x=page0.w/2
    delay=500
  }
}else if(new_x>=max_out)
{
  j1.val+=10
  if(j1.val>=100)
  {
    //reset
    tm0.en=0
    page 0
  }else
  {
    // next round
    new_x=page0.w/2
    delay=500
  }
}
//handle y-bouncing
if(new_y<=min_y)
{
  new_y=min_y // adjust step to bounce with pixel precision even if step would go beyond
  vect_y=-1*vect_y // reverse y-direction
}else if(new_y>=max_y)
{
  new_y=max_y // see above about step adjustment
  vect_y=-1*vect_y // reverse y-direction
}
// handle x-bouncing
if(new_x<=min_x)
{
  tmp_b=page0.h-h0.val
  tmp_t=tmp_b-h0.hig
  // bounce only if racket in position
  if(new_y>=tmp_t&&new_y<=tmp_b)
  {
    new_x=min_x // adjust step to bounce with pixel precision even if step would go beyond
    vect_x=-1*vect_x // reverse x-direction
  }
}else if(new_x>=max_x)
{
  tmp_b=page0.h-h1.val
  tmp_t=tmp_b-h1.hig
  // bounce only if racket in position
  if(new_y>=tmp_t&&new_y<=tmp_b)
  {
    new_x=max_x // see above about step adjustment
    vect_x=-1*vect_x // reverse x-direction
  }
}
//undraw at old position
cirs ball_x,ball_y,ball_rad,bco
//draw at new position
cirs new_x,new_y,ball_rad,pco
ball_x=new_x
ball_y=new_y
Here, you may download the .hmi file, created for the 3.2″ Standard HMI display, but as described above, the code allows you to run it on all sizes, you’ll just have to adapt the height and position of the 4 screen components: gam_dev
Thank you for reading and happy gambling! 🙂


