The Sunday blog: HMI, cybernetics and the steam engine
Part 7: Didactic code
Today is the day! Our project comes to an end! After we built a nifty GUI for our dishwasher HMI in the last episode and we set up a sophisticated system to transfer all the status information from the controller to the HMI within a single packed 30bit number (see Part 5), we’ll now write the code to animate our GUI.
The title of this episode is “didactic code”. That means, it comprises elements (like the “door open” flag of our dishwasher) which we don’t actually use in our GUI. It’s also written in a way which demonstrates the powerful opportunities of indirect component addressing, which adds a line of code here and there. But that makes it (hopefully) better understandable.
HMI as a service
Don’t worry, you’ll not need to re-create the full GUI and to re-write the full code. We’ll make it available in the Nextion forums on demand. Just ask there !
Only one at a time
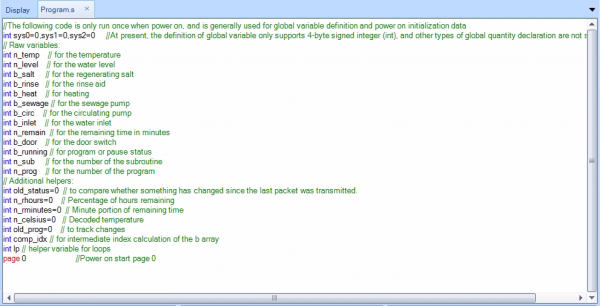
Our 4 program buttons have a particularity: Only one should be highlighted at a time. Thus, if a change occurs, it is important to know, if another button was already highlighted before, so that we can make it passive before we highlight the new one. To be able to loop through several component IDs, we’ll also need an additional helper variable. The final version of the program.s file where we define and initialize all variables looks now like this:
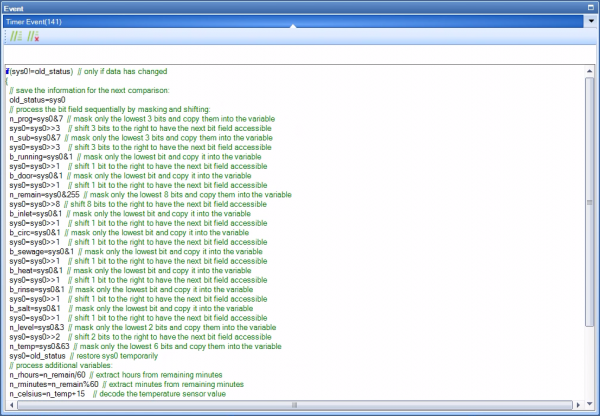
Now, in our timer event code, the first part where we unpack our 30bit status variable remains almost the same (just a few cosmetic changes and bug fixes):
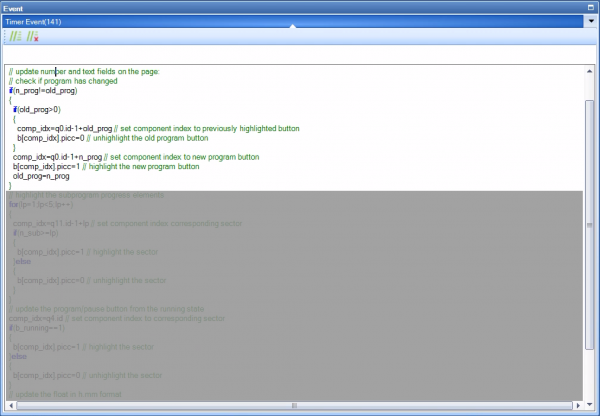
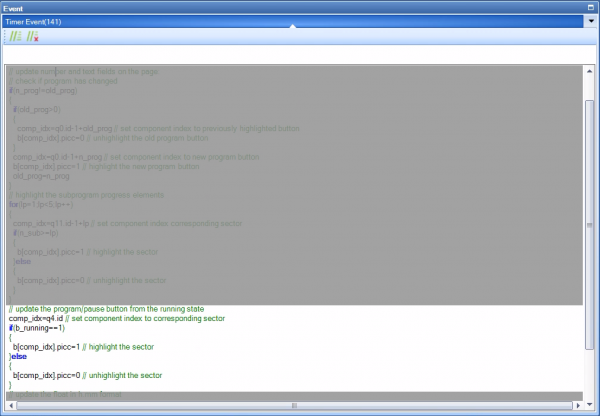
Afterwards, the code checks if the program has changed and if yes, if a previous button was highlighted, before it proceeds to set the .picc attributes accordingly:
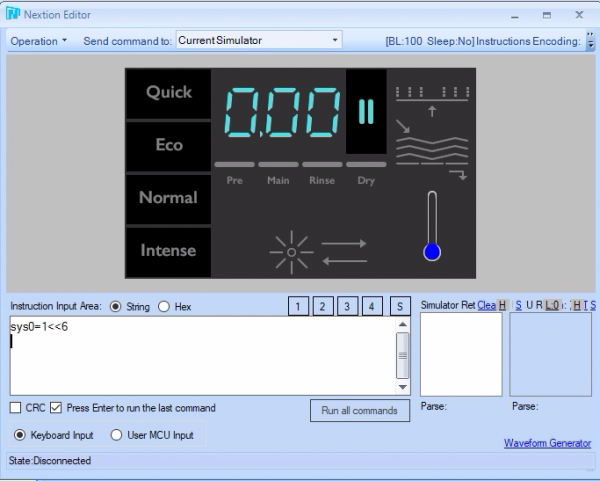
Quick testing is possible in the simulator like this. Setting sys0 consecutively to 1, 2, 3, and4 will make the program buttons light up on after another:

From… to…
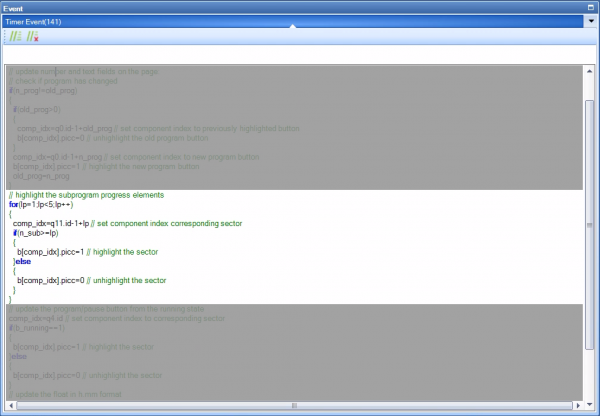
Our sub program display, although segmented into four crops, should rather behave like a progress bar. That means that a specific sub program number (bits3 to 5 of our status variable) will highlight the corresponding crop and all before:
A similar testing procedure can be done in the simulator. Think of shifting the desired sub program number left by 3 binary digits:

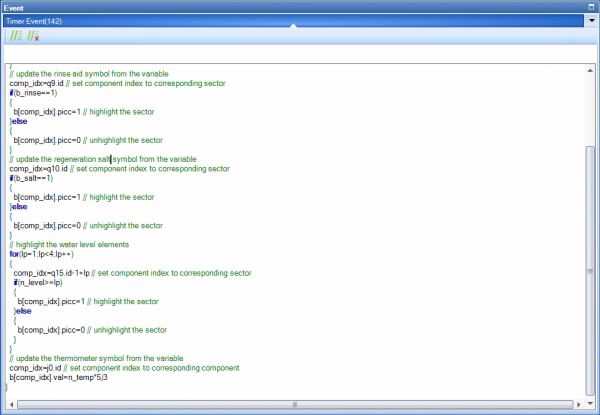
The same system applies to the three water level indicator crops, q15 to q17.
On and off
The program/pause button is animated from a single flag, b_running. Thus, its code is rather trivial:
… and the testing/debugging, too:
Again, the code for the other binary indicators (heater q7, spray arm q5, and all the others is then pretty identical.
The true progress bar
The thermometer uses a progress bar component, and thus, we’ll have to scale our n_temp variable which runs from 0 to 60 up, so that we’ll get values from 0 to 100. Before, you see the code of a few other binary indicators:
Remaining time
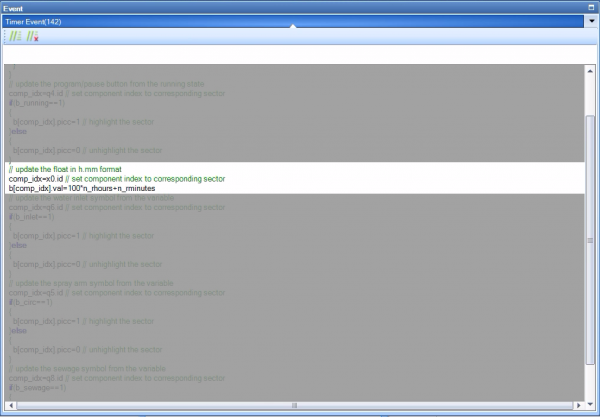
Here, we cheat a little bit and use an xfloat component to display the remaining hours and minutes in an easy way. Instead of the usual colon to separate the hours and minutes, we see a decimal dot, but overall, it makes the coding much simpler:
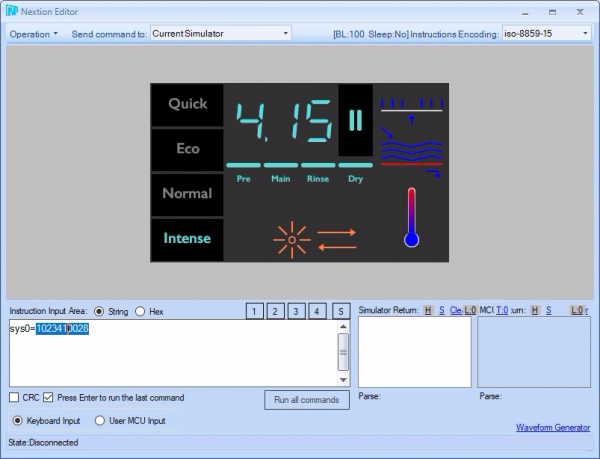
The final test
Now, with the complete code, we can use the debugger/simulator to do an over all check. A status value of 1023410028 will set the main program to “Intense”, the remaining time to 255 minutes (correctly displayed as 4h15), the temperature to maximum, and all binary indicator symbols to on:
And now?
That’s the end of this series of 7 episodes. From next Sunday on, we’ll look into special things which can be done inside the Nextion logic, without the need of an external MCU. At first, we’ll do some trigonometry and draw Lissajous patterns, transforming our Nextion HMI into a kind of electronic Spirograph!


