The Sunday blog: HMI, cybernetics and the steam engine
Part 3: Embedded development in detail
And here we are again. In episode 1 (link) and episode 2 (link) we followed the rapid technical development and saw how simple tools became machines that could do physical work for humans. And we saw how a new generation of machines emerged that could also do intellectual work for humans, the computers. The latter allows, provided the appropriate programming is in place, to control even very complex machines and to process the status of the machine from a large number of sensors and other measured values and to display them clearly and graphically on a screen.
The application area for embedded systems
However, not all machines are so complex that a large and expensive computer hardware and complex programming are required to record a few parameters and to derive control signals for the machine from them. For this reason, parallel to the increasingly powerful computers, there were also efforts to develop small processors for control tasks, which integrated additional hardware on the chip and memory capacity in order to contact the environment and autonomously perform control tasks. The so-called SoC (System on a Chip) was born.
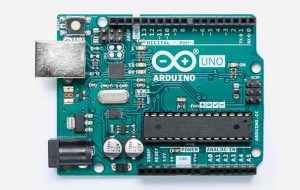
One of the most prominent representatives is the MCU, which is also the heart of the Arduino UNO: The ATmega328p, which combines on one chip for a few dollars an 8bit processor with 32kB Flash, 2kB RAM, 1kB EEPROM, 1 UART, 2 SPI, 1 I2C, an ADC with 6 channels, as well as timers for timing tasks and for generating PWM signals and pins that serve as inputs and outputs for logic signals, depending on the application. What a difference to a computer, which is much bigger, heavier and more expensive!
The limits of embedded systems

Such a small ATmega328P is quite capable of performing all control tasks that are required, for example, when operating a dishwasher. It could query a code switch at program start to know which wash program is desired, check via a switch whether the door is closed, open the water supply until the level sensor signals that the water level is sufficient, switch on the heating until the required water temperature is reached, then start the circulation pump for a certain period of time with the help of spray arms, and finally switch on the waste water pump so that the dirty broth is removed from the machine. The pre-washing cycle is now complete!
While this is a classic application for a SoC (interrogating switch positions and sensors and sending corresponding control signals to other units), we as dishwasher users have so far had no way of seeing what is actually happening. How nice it would be if a color display would show us, similar to a computer screen, at which program step the machine is at the moment, which water temperature is present, how long the program will still run and if there is still enough rinse aid and salt in the corresponding storage containers.
Graphical output on the display
In the last episode we have already seen that controlling a graphic display can quickly push an otherwise very powerful MCU to its limits. Since the data for a display must always be transferred in one go, the image must first be completely assembled and built up in the memory (RAM) of our SoC. For this we need 2 bytes per pixel at 16bit color depth. With 320 x 240 pixels (standard format), this is already 153600kB. But our system has only 2kB RAM! And even if we had enough memory, it would take about 1/6 second to send a complete image to the display via SPI as fast as possible. But before it can be sent, it still has to be generated. First, all pixels must be set to the background color.
Then font tables have to be read in and the corresponding letters and numbers rendered, i.e. the corresponding pixels have to be overwritten with the foreground color. Maybe you want to add some geometric elements, a progress bar for example or a stylized thermometer, and our SoC is already busy with the graphics and has no more time and resources to do its actual job! It does not work like that! The computer world understood this earlier and looked for ways to relieve the CPU and delegate the complex graphics tasks to a specially optimized graphics processor (GPU) with its own graphics RAM and outsource the whole thing to a graphics card.
And finally we come to the NEXTION HMI
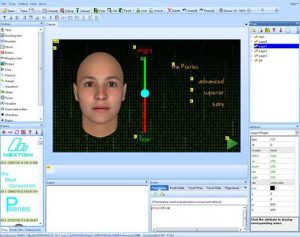
An expensive graphics card that can handle a variety of screens and resolutions is of course no solution for our SoC, which is programmed for a specific task. What could be more obvious than combining another SoC with a color LCD display and touch function, calling it NEXTION HMI and assigning it the complex graphic tasks so that only a few data and commands have to be sent back and forth between our SoC and the HMI quickly?
Of course, the HMI must know what it should display and how, which means its SoC must also be programmed. But because the HMI is a graphical user interface, it is only logical to create it in a graphical editor with just a few mouse clicks and dynamically adapt it with a few macro instructions so that simple and short text based commands and values are sent between SoC and HMI without interfering with the main program flow.
And this is exactly what we will do in the next episode: we will implement a control unit for our virtual dishwasher step by step with the NEXTION Editor, so that the Nextion HMI not only serves as a passive display, but also allows us to select, start and pause the wash program. We will also get to know advanced techniques. It remains exciting!


